Master Photoshop & Illustrator: Create Stunning Website Graphics Like a Pro!
In today’s digital landscape, website graphics play a crucial role in capturing user attention and enhancing the overall user experience. High-quality visuals not only make a website aesthetically appealing but also contribute to better engagement and conversions.
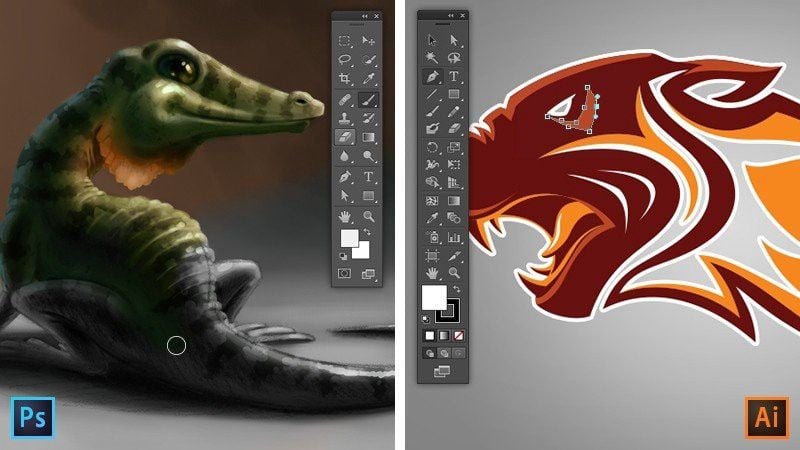
Adobe Photoshop and Illustrator are the gold standards in graphic design, widely used by professionals to create compelling website graphics. Photoshop is ideal for image editing, manipulation, and pixel-based graphics, while Illustrator excels in vector-based designs, ensuring scalability and sharpness. Mastering both tools allows designers to craft stunning visuals that elevate web design quality.
Why Use Photoshop & Illustrator for Web Design?
Photoshop and Illustrator serve distinct purposes in web design, and understanding their differences is key to utilizing them effectively.
Photoshop: Ideal for Raster-Based Editing and Web Layouts
Photoshop is a pixel-based (raster) design tool that is primarily used for working with images, detailed graphics, and UI/UX layouts. It excels in:
- Photo Editing & Retouching: Adjusting brightness, contrast, colors, and removing imperfections using tools like the Clone Stamp and Healing Brush.
- UI/UX Mockups: Creating website layouts and wireframes with precise control over layers and elements.
- Image Manipulation: Applying filters, textures, and special effects to enhance web graphics.
- Responsive Design Previews: Designing web pages at different resolutions to test user experience.
- Web Optimization: Exporting compressed images in web-friendly formats like JPEG, PNG, and WebP.
Illustrator: Best for Vector Graphics & Scalable Elements
Unlike Photoshop, Illustrator is a vector-based tool, meaning that designs remain crisp and scalable at any resolution. Illustrator is particularly useful for:
- Logos & Branding: Creating logos and branding elements that look sharp on any screen size.
- Icons & Infographics: Designing vector icons, charts, and illustrations that can be resized without losing quality.
- Typography & Custom Fonts: Creating and modifying text with precision for unique website typography.
- Vector-Based UI Elements: Designing buttons, backgrounds, and graphical elements for seamless integration into web design.
- SVG Graphics: Exporting assets in SVG format, ensuring they remain lightweight and scalable for modern web use.
How They Complement Each Other
By combining Photoshop’s detailed editing capabilities with Illustrator’s precision in vector creation, designers can produce high-quality assets tailored for modern websites.
Mockup to Asset Creation: Design initial website mockups and wireframes in Photoshop, leveraging its raster-based tools for realistic previews and image manipulation. Then, export specific elements (like logos, icons, or illustrations) and refine them in Illustrator using vector tools for scalability and clean lines. This ensures that the final assets are crisp and resolution-independent.
Image Editing and Vector Enhancement: Start with a photograph in Photoshop, adjusting colors, retouching, and adding effects. Bring that image into Illustrator to create a vector mask or trace elements, allowing you to seamlessly integrate the photo with vector graphics or create scalable versions for different screen sizes.
Text and Typography: While Photoshop has some text capabilities, Illustrator excels at precise typographic control. Design complex typography in Illustrator, then import it into Photoshop for integration within the website mockup. This gives you the best of both worlds: design in a vector environment for scalability, and composite in a raster environment for context.
Button and UI Element Design: Design pixel-perfect buttons and UI elements in Illustrator for their clean lines and scalability. Import these into Photoshop to create hover effects, shadows, and other visual treatments that simulate the interactive behavior of the website.
Pattern Creation: Create seamless patterns in Illustrator, taking advantage of its pattern tools. These patterns can then be imported into Photoshop and applied to backgrounds, textures, or other elements within the website design.
Logo Design and Integration: Logos are almost always created in Illustrator due to their need for scalability. These logos are then easily placed into Photoshop mockups to demonstrate how they will appear on the final website.
Exporting for Web: Both programs offer various export options optimized for web use. Illustrator excels at exporting SVGs (Scalable Vector Graphics), ideal for icons and other interface elements that need to resize without loss of quality. Photoshop can export optimized JPEGs, PNGs, and GIFs for images. By using both programs, you can choose the best format for each asset type.
Collaboration and File Sharing: While not directly complementary in terms of features, understanding how to move files between Photoshop and Illustrator is crucial for team collaboration. Knowing how to package assets and maintain organized file structures ensures a smooth workflow.
Prototyping Integration: While not directly within Photoshop or Illustrator, the final PSD mockups can be imported into prototyping tools (like Adobe XD or Figma) for interactive testing. The clean vector assets created in Illustrator ensure that the prototype looks crisp and professional.
Essential Photoshop Skills for Web Graphics
Creating & Editing Images
- Color Correction & Grading: Adjusting color balance, hue, saturation, and contrast to achieve the desired mood and consistency across web assets. Tools like Curves and Levels offer precise control.
- Image Masking & Selection: Isolating specific parts of an image for targeted edits or compositing. Techniques include using the Pen Tool, Quick Selection Tool, and Layer Masks.
- Combining Images: Blending multiple images seamlessly to create unique visuals for hero banners, backgrounds, or product mockups.
- Creating Graphics from Scratch: Utilizing shapes, text, and layer styles to design original graphics like icons, buttons, and social media visuals.
Working with Layers & Smart Objects
- Blending Modes: Experimenting with different blending modes (e.g., Multiply, Overlay, Screen) to create interesting effects and integrate elements seamlessly.
- Layer Styles: Adding effects like shadows, glows, and strokes to layers non-destructively, enhancing visual appeal and consistency.
- Smart Filters: Applying filters non-destructively to Smart Objects, allowing for adjustments even after the filter is applied.
- Organizing Layers with Folders: Using folders to group related layers, improving organization, especially in complex projects.
Optimizing Images for Web
- Understanding File Formats: Choosing the appropriate file format (JPEG for photos, PNG for graphics with transparency, WebP for superior compression) for optimal image quality and file size.
- Lossy vs. Lossless Compression: Understanding the trade-offs between image quality and file size when using lossy (JPEG) vs. lossless (PNG) compression.
- Metadata Removal: Removing unnecessary metadata (e.g., camera settings) to further reduce file size.
- Using Image Optimization Plugins: Leveraging plugins to automate the optimization process and achieve the best possible compression.
Working with Text & Typography
- Creating and Formatting Text: Using the Type Tool to add and style text for headings, captions, and other web elements.
- Choosing Web Fonts: Selecting fonts that are web-safe or using web font services to ensure consistent typography across browsers.
- Text Effects: Applying layer styles or filters to text to create visually appealing headings and call-to-actions.
- Paragraph and Character Panels: Utilizing these panels to fine-tune text alignment, spacing, and other typographic settings.
Illustrator Techniques for Web Design
Designing Scalable Vector Elements
- Pen Tool Mastery: Practice precise path creation for complex shapes and illustrations. Use anchor points strategically for smooth curves and sharp corners.
- Shape Builder Tool: Combine and subtract shapes intuitively to create intricate designs. This is excellent for icon design and complex UI elements.
- Pathfinder Panel: Explore various Boolean operations (Unite, Subtract, Intersect, Exclude) to manipulate shapes and create unique forms.
- Symbol Creation: Turn frequently used elements (like icons or buttons) into symbols. This allows for easy editing and updates across your design.
Using Artboards Effectively
- Artboard Organization: Name and organize artboards logically for easy navigation and export. Consider using prefixes or suffixes to denote different screen sizes or asset types (e.g., “desktop-header,” “mobile-icon”).
- Exporting Artboards: Utilize the “Export for Screens” feature to efficiently export multiple artboards in various formats (SVG, PNG, JPG) and resolutions.
- Nested Artboards: Explore using nested artboards for managing different versions or variations of a design within the same file.
Creating Icons, Logos & UI Components
- Icon Design Principles: Focus on simplicity, clarity, and visual consistency. Use a limited color palette and ensure icons are recognizable at small sizes.
- Logo Design Best Practices: Design logos in vector format for maximum scalability. Consider the logo’s application across different platforms and sizes.
- UI Component Libraries: Create and maintain a library of reusable UI components (buttons, form fields, etc.) for consistent design and efficient workflow.
- Typography in Web Design: Choose web-safe fonts or utilize web fonts for optimal readability and visual appeal. Pay attention to font size, line height, and letter spacing.
Advanced Illustrator Techniques for Web
- Gradients and Patterns: Apply gradients and patterns to add depth and visual interest to your designs. Ensure they are optimized for web performance.
- Blending Modes: Experiment with blending modes to create unique effects and overlays.
- Effects and Filters: Use effects and filters sparingly, as they can sometimes impact performance. Always preview the final output to ensure it meets your expectations.
- Working with Pixel-Aligned Artwork: Ensure your artwork is pixel-aligned for crisp rendering on screen, especially for icons and UI elements.
- Collaboration and Version Control: Utilize cloud storage and version control systems to collaborate with other designers and manage design iterations effectively.
Best Practices for Stunning Website Graphics
Color Schemes & Typography Tips
- Consistency in Branding: Maintain brand colors across all web elements.
- Using Contrast Effectively: Enhance readability and visual hierarchy.
- Web-Safe Fonts: Choose fonts that are legible on all devices.
Maintaining Consistency Across Designs
- Design Systems & Style Guides: Create reusable elements for uniformity.
- Grid-Based Layouts: Ensure balanced and structured web designs.
- Testing on Multiple Devices: Check how graphics appear across screens.
Exporting for Different Screen Resolutions
- High-Resolution Exports: Ensure quality on high-DPI displays.
- SVG Format for Vectors: Keeps icons and logos crisp at any scale.
- Different Image Formats: PNG for transparency, JPEG for compression, WebP for optimization.
FAQs
1. What is the best format to save web graphics?
PNG is great for transparency, JPEG is ideal for compressed images, and SVG is best for scalable vector graphics.
2. How do I ensure my website graphics load quickly?
Optimize images using compression tools, choose the right file formats, and use lazy loading techniques.
3. Can I use Photoshop and Illustrator together?
Yes, Photoshop is great for raster editing, while Illustrator handles vector graphics. Combining both ensures high-quality web design.
4. What are the best fonts for web design?
Web-safe fonts like Roboto, Open Sans, and Montserrat ensure readability across different devices.
5. How do I make my website graphics responsive?
Design assets in multiple sizes, use SVG for icons, and test across various screen resolutions.
Ready to Master Digital Marketing? Sign Up Today!
Inspiring Job Placement Success Stories

Our Achievers Ready to Lead the Industry